One File, Three Looks: Choosing the Right Materials for Your Glowforge Project
My favorite thing about designing for the Glowforge is choosing materials for my project.
For a while, I didn’t give this aspect too much thought. I used the materials I had on hand (ahem, Baltic birch—hey, I was a newbie!), and that was that.
Over time, I realized that small tweaks in material choice can have big impacts on the look/feel/vibe of your finished product.
My customer base appreciates a boho vibe, so I try to work within that aesthetic to choose materials that fit into their home decor.
I wanted to show what a big impact your materials can have on your final project by showing the same (okay, similar…I’ll discuss the tweaks I made below) file in three different materials.
This project uses my Habit Tracker/Mood Tracker file (available here). The file bundle comes with 4 versions so that you can use it with virtually any material combo.
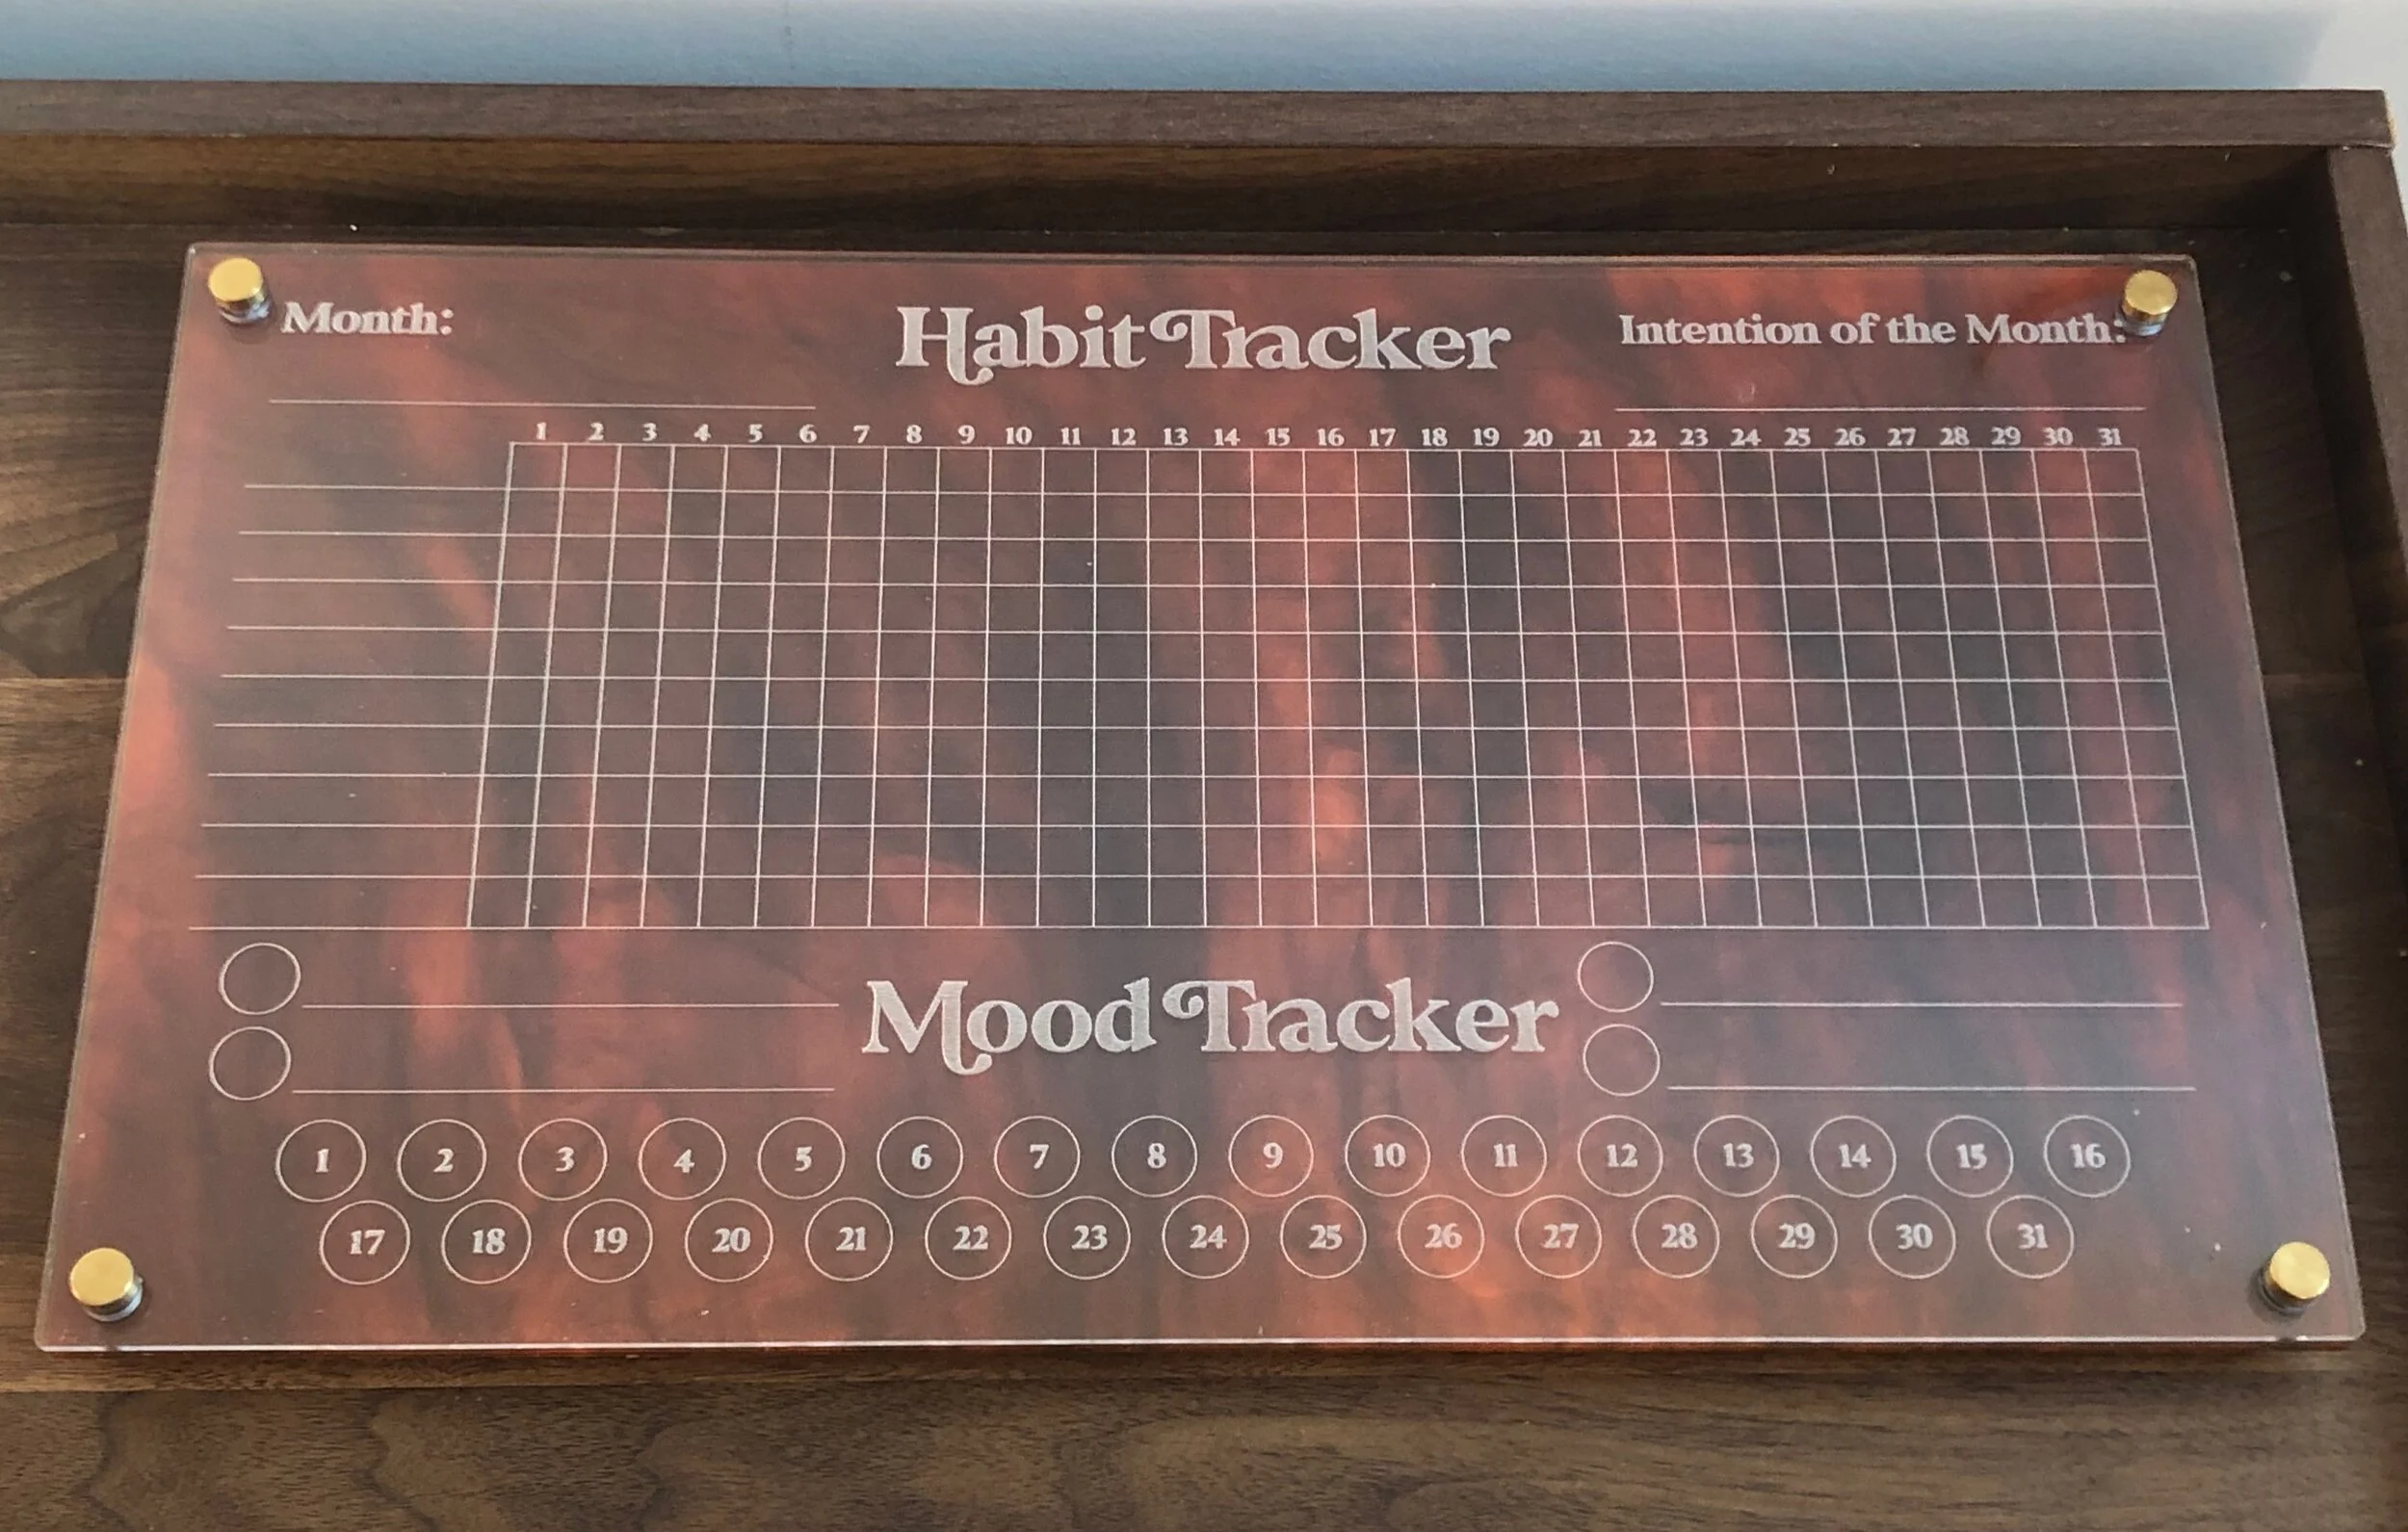
Here’s my favorite version first: the tortoiseshell acrylic.
I used Tortoise Twist acrylic from Cerulean Tides’ VIP shop, clear acrylic from Smokey Hill Designs, and gold standoffs from Amazon. Note: links in this post are not affiliate links. I plan to use white and gold chalk markers with it since ordinary dry erase markers won’t show up on the dark background.
For this version, I engraved the mirrored design on the back of the clear acrylic so the front would be smooth. The tortoise acrylic engraves pretty darkly, so I didn’t want to engrave it there.
Note: This is Version 4 in the file bundle.
Now, let’s take a look at another version: the white oak and clear acrylic.
I used 1/8” white oak and clear acrylic from Smokey Hill Designs and the same gold standoffs from Amazon. The clear acrylic is necessary for the design to be dry erasable, but I engraved the design right onto the white oak.
This version uses Version 2 in the file bundle.
Finally, let’s take a look at a more straightforward version: the white board.
I used reversible whiteboard/chalkboard from Home Depot.
You might notice that the numbers are not inside the circles in this version—that’s because I don’t want the dry erase marker to get gunked into the engraved parts.
I also skipped the holes for standoffs in this one (the file has them, but I set that step to Ignore in the Glowforge app).
This is Version 3 in the file bundle.
In case you’re wondering where Version 1 is in this post, I haven’t been able to bring myself to finish it yet.
I did a painted clear acrylic version, engraved the design from the back, and then couldn’t stand weeding the masking from those one million tiny squares without being able to use my trusty plastic razor (it scratched the paint!).
Will I ever finish it and update this post? I suppose it’s possible…
Anyway, there you have it: one file, three ways.
Which is your favorite? Which materials do you like best? What will you use to make your own version? If you decide to make one, send me photos and I’ll feature them on my social media and the newsletter. Email them to jacquelyn@thefabletree.com.


